Whenever an item from your church's inventory is loaned out, a loan record should be created to keep track of who and where that item is located. Below, we'll walk through adding and editing loan records:
- Click on the Inventory tab at the top of the Scheduler module, and then, click on the loans tab on the left side of the window to access the Loans view.
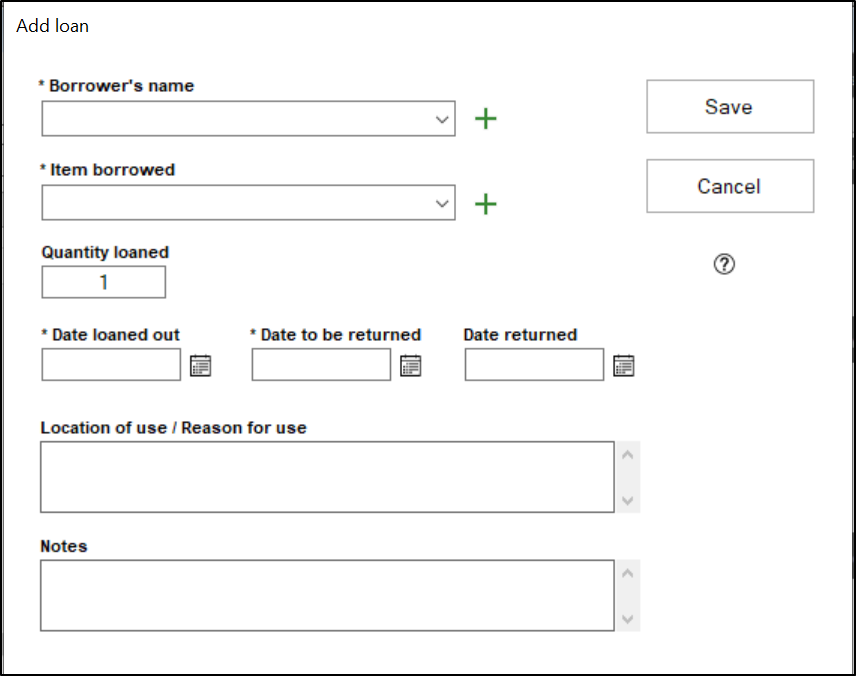
- Click the Add button at the bottom of the window to create a new Loan record, or click on an existing Loan record and click edit to update that record.
- In the loan record, start by selecting the borrower's name from the Borrower's name field. This field contains a list of all the Contacts you have in the scheduler module. If you need to add a new contact, click the green plus sign button to the right of this field.
- Next, select the item that is being borrowed in the "Item borrowed" field. This will contain all items in the inventory records, as well as all vehicle records. If you need to add an inventory record, click the green plus sign button to the right of this field.
- Select the quantity of the item being borrowed in the "Quantity loaned" field, as well as the date that the item was loaned out in the "Date loaned out" field and the date the item is scheduled to be returned on in the "Date to be returned" field.
- Once the item has been returned, you can fill in the "Date returned" field to "close out" the loan.
- Fill in the location the item will be used in and the reason for the loan in the "Location of use/Reason for use" field. Any additional notes that may need to be recorded can be filled in under the "Notes" field.
- Click "Save" when finished, to add the loan record.