Adding inventory records is necessary for tracking how items at your church are used in different Rooms and Events. We'll walk through the steps below on how to create inventory records, or edit existing records.
Note: The Out of Service check box is for items that are either in need of repair and therefore not able to be used or items that have been sent out for repair and not currently on the property.
- Access the Inventory view by clicking on the "Inventory" tab of the Scheduler module.
- Click the Add button at the bottom of the Inventory view.
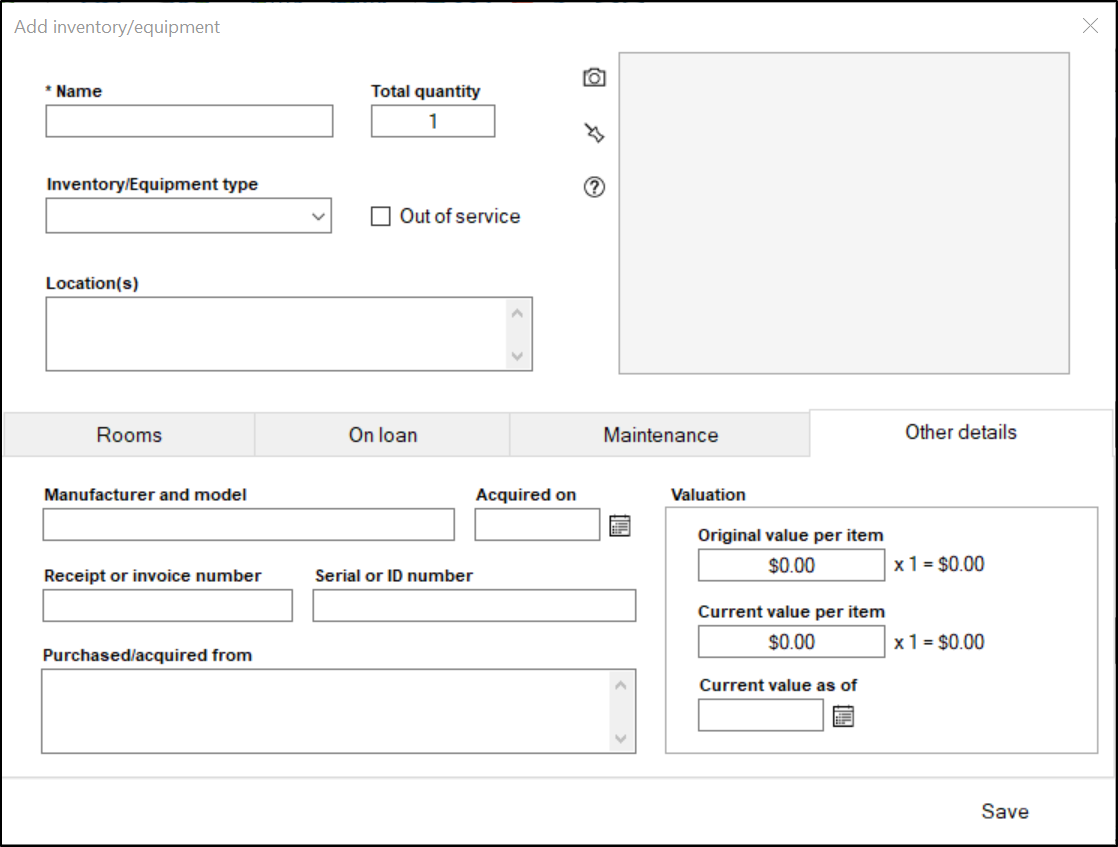
- Enter the Name of the item in the "Name" field.
- In the "Total quantity" field, fill in how many of this item the church has, in total.
- In the Inventory/Equipment type field, fill in what type of item this is, such as "Audio/Visual"
- In the Locations section, fill in where in the church you have this item stored.
- If you would like to add a photo of these item(s), click the camera icon to upload a photo. To add notes, click the thumbtack icon.
- The Rooms and On Loan tab will show which rooms these item(s) are associated with, and the loan records associated with these item(s).
- The Maintenance tab will show you the maintenance records for these item(s)
- The Other details tab will let you enter additional information, such as Manufacturer and Model of the item(s), when the item(s) were acquired on, receipt or invoice number, serial or ID number, where the item was purchased/acquired from, and the value of the item.
- When finished, click Save.