The Mail Merge report exports basic Household, Person, and Contributor information in a format that is readable by other software programs. This file can be saved in the computer or exported to Word or Excel for customized letters and spreadsheets. To access the Mail Merge click the reports icon (a stack of pages with an R and a graph on it) on the Shepherd's Staff central toolbar and select "Mail Merge".
When exporting data, you need to select which fields you would like to export out. You can do this by double clicking on the field you want to export or clicking on the field you want to add and pressing the "Add" button.
Mail Merge can be used for a number of different applications; custom form letters, importing contacts to MS Outlook, creative spreadsheets, etc.
- First, if the mail merge you will be setting up is one you will need to prepare again frequently in the future, you will want to set this up as a Layout. Press the "Add" button down in the bottom left corner of the window, and then fill out the name you would like to use for the layout. You can then add it to a category in the category field, give it a report name and input a brief description in the description field.
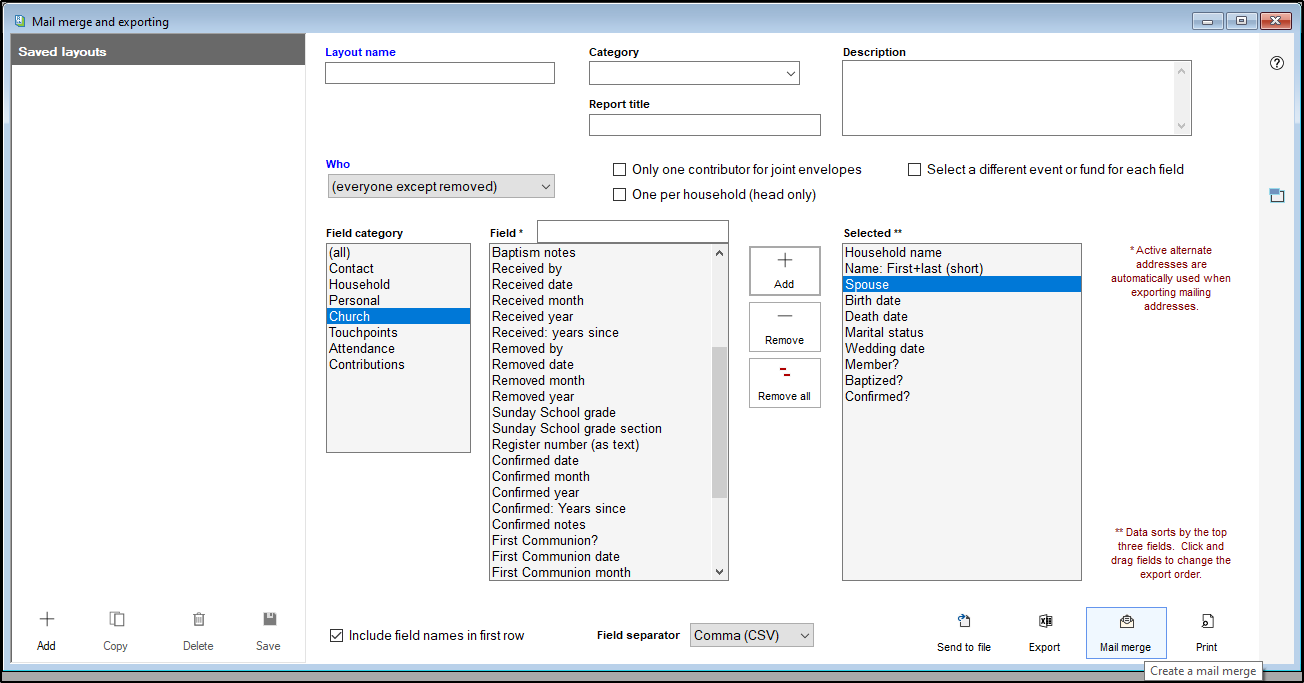
- The next step is to choose the group for which you need this mail merge for. In the Who field you can select all records, a Subgroup of records, or even just one person or household. Apart from those options, you can run the report for a specific list or grade, as well as using the built-in Household Newsletter group. There are three checkboxes that modify the output of this report.
- Only one contributor for joint envelopes —If you export out contribution information, this will ensure that each envelope, instead of each person, gets a single row of information.
- Select a different event or fund for each field —When printing for one event or one fund, check this box if you want to select a different event/fund for each field, which allows you to print a comparison report with a different event/fund in each column
- One per household (head only) —When exporting out your information, this will ensure that each household, instead of each person, gets a single row of information
- Next, select which area you want to pull fields from in the Field category box. In this box, you can select from different areas of Shepherd's Staff that have different fields. If you need to use a combination of fields from different areas, use the (all) option to have all fields from all areas available to you.
- In the field column, scroll through the list to find the fields you would like to have included in your Mail Merge. Once you have found a field you want to add, double click it to add it to the Selected column. You can also highlight the field you'd like to add and click the "Add" button to add the field to the Selected column. If you need to remove any fields from the Selected column, double click the field, or click on it and then click the "remove button". If you want to clear the selected column, click "Remove all"
- Once you have selected all the fields you want, check the box if you want to include field names in the first row of your export. Then, choose what you want to use for your field separator. Comma(CSV) will separate each field for each person with a comma and produce a CSV file when clicking Send to File. Tab and Pipe will use a tab and pipe respectively to separate each field for each person and will produce a TXT file when using the Send to File option.
- Click Export to pull up your data in your chosen Spreadsheet program (usually Microsoft Excel). If you click the Mail Merge option, this will take you directly to Microsoft Word to a Word Macro document. Print will provide you with a printable version of the fields you selected.
Creating a Form Letter with Mail Merge
This next section will describe creating a form letter using Mail Merge, using Microsoft Word in Office 365, however, these instructions will be similar for earlier versions of Word as well.
- Following the steps in the previous section, choose comma for your field separator and click "Send to File". Save your CSV file with a name you will easily recognize in a location you can easily find (your desktop is a good option.)
- Open the letter you want to insert fields into in Microsoft Word.
- Click on the Mailings tab, click the down arrow on "Select Recipients" and choose "Use an Existing List"
- Select your Mail Merge file you exported, and click Open. Click OK at the next window.
- Click at the point you want to insert one of your fields from your Mail Merge, and then, in the toolbar, click the drop down arrow for "Insert Merge Field" and select which field you want in the spot you have selected. Repeat this process til you have placed all the fields that you want within your letter.
- When you're finished, you can click the Preview Results button on the toolbar to preview what your letter will look like with actual data. When you're ready to print, click Finish and Merge and choose Print documents to print out your letters.