You will need to add Key records for your church to keep track of who has which keys, and what rooms these keys go with. We will walk through the process of adding key records below, or editing an existing key record.
- To access the Keys view, click on the Inventory tab at the top of the Scheduler module window, and click on the "Keys" tab on the left side of the window.
- Click the "Add" button at the bottom of the view, or to edit an existing key record, click on the key record you need to make changes to and click "Edit" at the bottom of the grid.
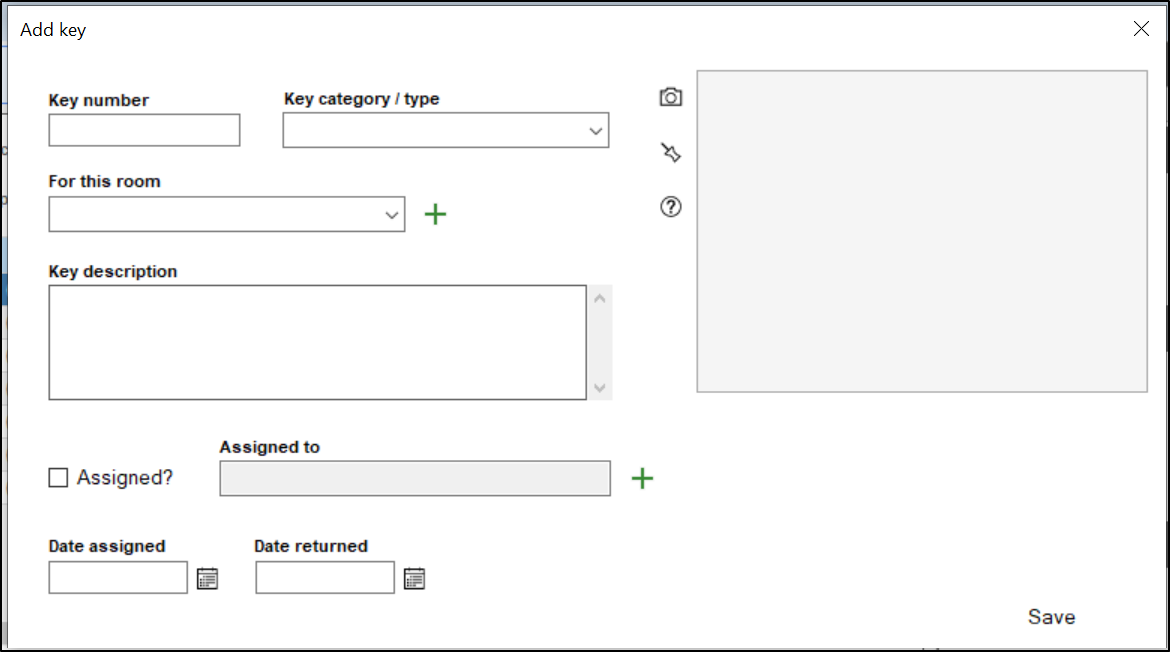
- Fill in the Key Number field, if needed.
- In the Key category/type field, you can describe the usage of the key, such as if it is a building key, a key to a specific room, or maybe a key to a desk or safe.
- In the "For this room" field, select what room this key goes to. If you need to add a new room, click the green plus sign button to the right of this field.
- The key description may describe what the key looks like, or if it's not to the room specifically, but maybe a safe or desk within a room, you can say what item within the room it belongs to.
- To add a picture of the key, click the camera icon, and you can attach a photo of the key to the key record. To add notes on the key, click the thumbtack icon.
- If the key has been assigned to a person, check the "Assigned?" box. This will let you select a contact in the "Assigned to" field. If you need to add a contact, click the green plus sign to the right of the "Assigned to" field.
- In the Date assigned, and Date returned field, fill in the date the key was assigned to the contact, and what date that contact returned the key. If this key is reassigned, you will need to select a new contact and fill in these fields again, you may want to add the information on who had the key previously to the notes field.
- Click Save at the bottom right of the window to save the Key record.